I’ll be travelling back up to Manchester today from London, but I just spent the last four days on Simon Moore‘s incredible Fluid Preservation Course at the Horniman Museum and Gardens. The course consisted of lectures, practical demonstrations and the basics on how to rehydrate, fix and preserve specimens. I won’t go into great detail about the practicalities of the course, as it was a lot of information to take in and the best way to learn really is to go on the course!
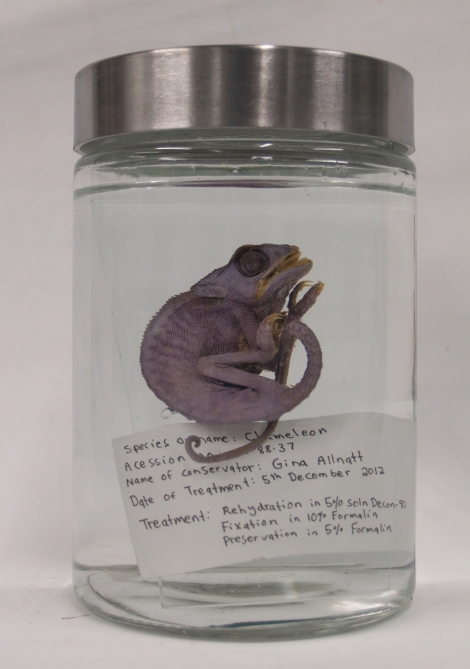
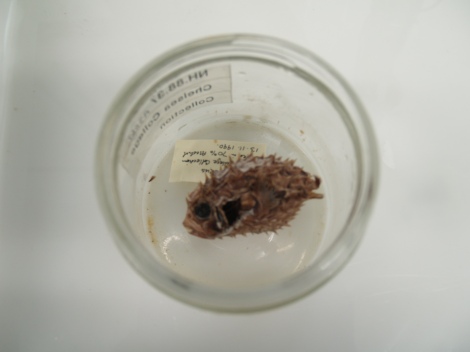
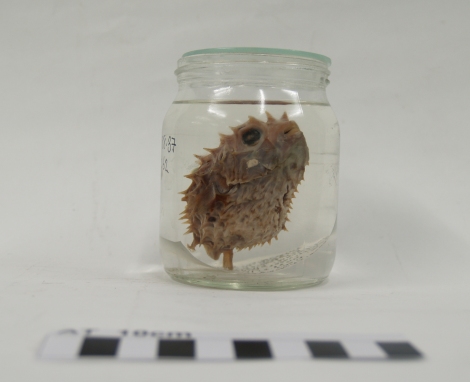
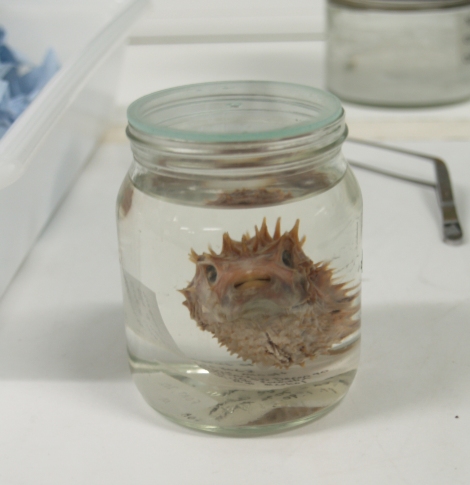
We had a lecture in the morning every day before heading to the conservation lab to work on our specimens. Lectures covered the history of fluid collections, fixation, historical sealants, how to mount pelagic specimens, botanical preservatives, label ink, problems with contaminants and testing fluid. On our first day we were told to choose two specimens from a selection that had been brought up from storage. All the specimens were completely dehydrated and in need of TLC. I chose a chameleon and a porcupine fish.
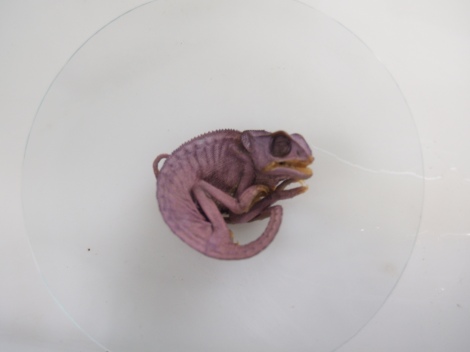
The first thing we needed to do was rehydrate the specimens. They were placed in a solution of Decon-90 and placed on a hotplate, where they were kept at a low temperature. My chameleon was a dull, nondescript grey when I started out, but as he slowly absorbed the Decon-90 he began to take on a pink colour.

By the time he was ready, he was a lovely purple colour!
My porcupine fish didn’t have quite such a dramatic colour change, but it did swell up a bit. Next I injected both the chameleon and fish with a fixative of Formalin. The specimens were also left overnight in the formalin. The following day I started the Porcupine fish on an “alcohol ladder”- this is where the specimen is slowly brought up in increasing strengths of alcohol solution, finally being preserved in 80% alcohol.
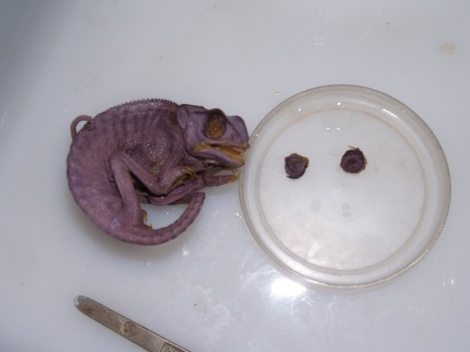
The Chameleon was a different matter. First, its eyes were rather sunken after being dried up for so long, so at Simon’s suggestion I removed them and placed a gelatin pocket behind each one. This gave the reattached eyes the appearance of looking more natural.

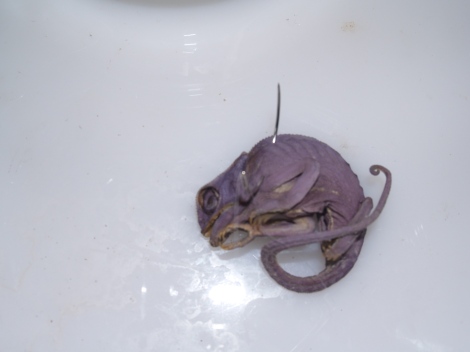
The chameleon was then placed in 5% formalin. I used formalin rather than alcohol for this specimen because formalin preserves colour better. I then used a large curved needle to thread some monofilament through the specimen so I could tie it to a glass backing plate. (We also had practical demonstrations on how to cut glass, drill glass, grind glass and seal glass jars.)
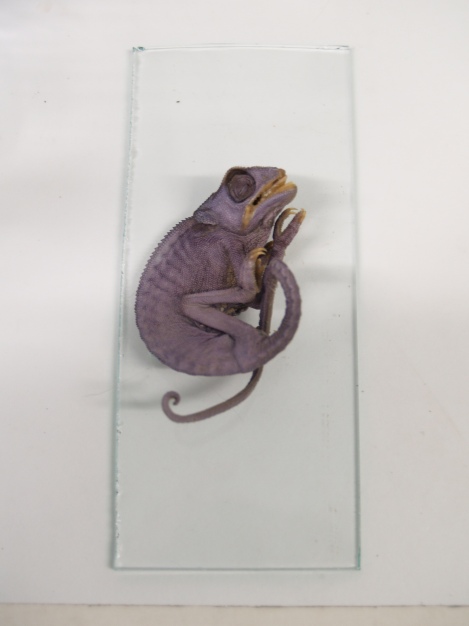
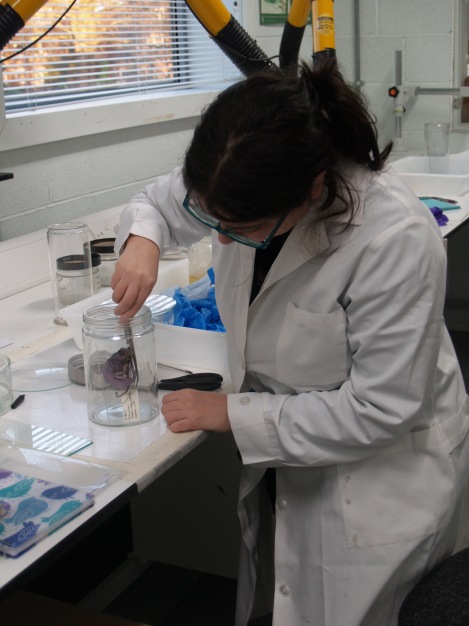
Here I am adjusting my chameleon’s new label:
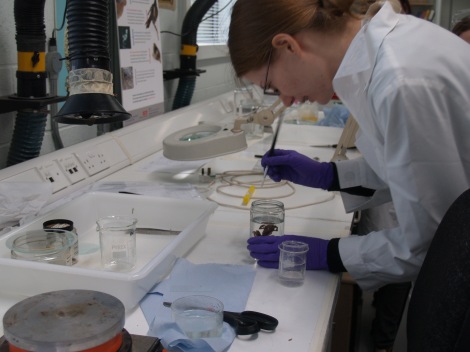
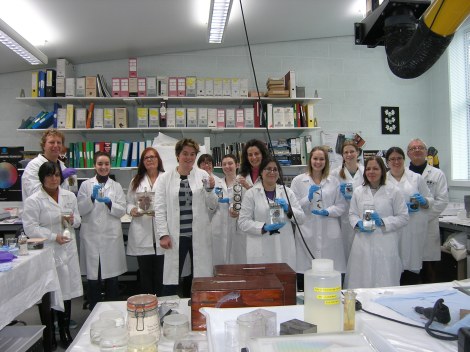
Another great thing about the course was meeting new people and seeing old friends. Here’s my museum buddy Rachel Jennings working on a tree frog specimen:
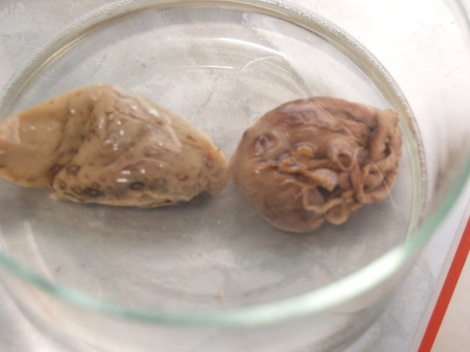
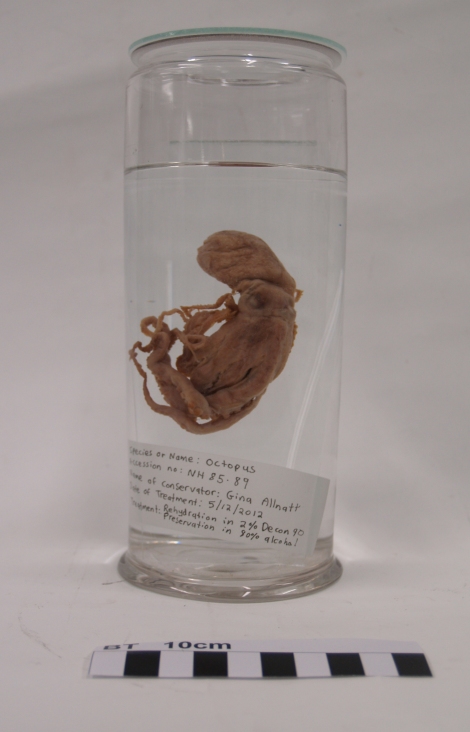
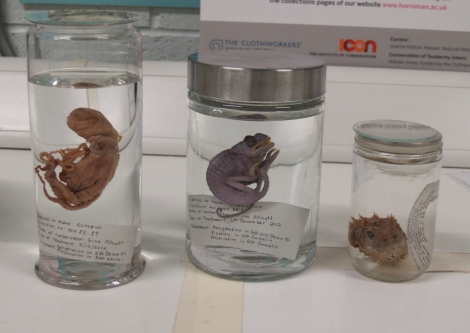
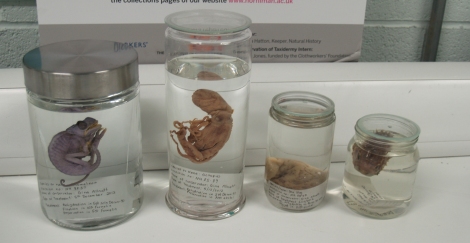
I also worked on a sea slug and small octopus. The following are some before and after pics of the specimens
Before:
Backing plate:

After:
Before:

After:
Before:
After:
Hope you enjoyed this post! I highly recommend going on the course if you’re interested in caring for spirit collections.

You’ve certainly been busy over the past few days Gina! Glad you enjoyed it.
I’m in Southport next week too working on the Botanical collections! For now though, happy to just sleep haha. See you soon.
That is so, so cool.
I really enjoyed it. Can’t wait to try out techniques on botanical specimens.
Absolutely fascinating……..